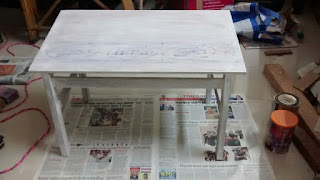
ad

Tuesday, February 28, 2017

Nailing the wood - DIY woodworking India

Nailing the wood - DIY woodworking India

"Its not always how hard you can hit"

Have you observed that when you hammer a nail into a piece of wood, sometimes the nail gets bent? Its really annoying, isn't it?  There is a science behind it. It is not always how hard you can hit, but how efficiently you should hit.

There are different categories of nails available starting from very thin, fine ones to thicker ones. The metals used also differ among different types. Therefore, the hammering force and technique depends on types of nails too.

Secondly, what type of wood you are hammering the nail into? In general, hardwoods are more harder outside than inside. Therefore, we often have to hammer lightly till the nail goes some distance into the wood. Once it gets inside more than half way depth, you can hit hard.

Another technique is, when you see your nail gets bent most of the times, pre-drill a hole which is 3/4 thick as that of the nail and 1/2 the length. Once the hole is made, hammer your nail. You will notice the improvement.

Monday, February 27, 2017

Plywood joinery mistakes - DIY woodworking India

Plywood joinery mistakes - DIY woodworking India

Perpendicular join


Welcome. We DIY woodworkers often work on plywoods, the most available solid woods in and around. We often have to join them in different ways to build different kinds of structure. For example, while working on a simple kitchen cabinet, we join them using nails, screws etc. But are we joining them in the correct way? I hope so. Let's see the figure below.


Consider it as a wall mount cabinet, the left side and the bottom. Look at the joinery. We usually screw them from side penetrating the bottom. Is it the correct way? It is not. Why? The plywood can really hold it strong when you penetrate it perpendicular to the surface. But it is not when you penetrate it along the surface. Multiple thin wooden surfaces are fixed or attached together using adhesives applying high pressure and that is how, a plywood is made. When the nail or the screw goes along the join, instead of making the join strong, it will put pressure to make it apart.


Consider that the nail goes inside the base as shown in the picture. When we put weight on the base, the area around the nail gets weaker. The more weight we put, the more weaker the base surface becomes.

The correct ways will be use of L bracket or use of beading or use of groove.


This way the screws are always go perpendicular to the plywood surface without making it weaker in the internal joins. Another way can be keep the vertical part of L inside the side part. That way you can hide the bracket. In both the cases you may have to extract some wood from the plywood surface so that the bracket sits at the same level of the surface.


In the beading way, the extra piece of beading plywood provides a solid strength. The base plywood sits on top of it. The nails go perpendicular here as well.

There is another way. You have to make a groove line in the side cabinet and the base goes into it. Let me illustrate it.


The groove is made using a wood router. For instance, in a 18mm plywood, the groove is around 4-6 mm deep and 18mm wide(may be slightly more considering if we use laminate to the whole base). In that groove, the edge of the base goes in perfectly and the sides hold the base quite strongly. I like this way very much because it looks clean and feels strong due to the locking. Over and above, you use screws from side to keep it still, just still as it is already strongly held.


To be continued.

Saturday, February 25, 2017

Building a simple wash basin table from old woods - DIY woodworking India

How to build a simple wash basin table - DIY woodworking India

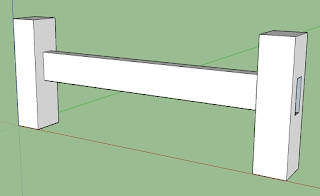
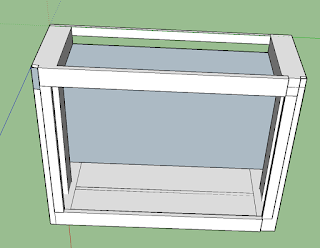
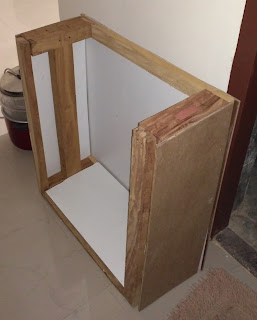
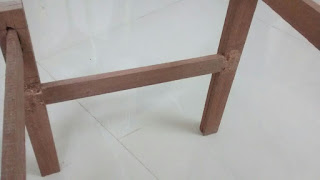
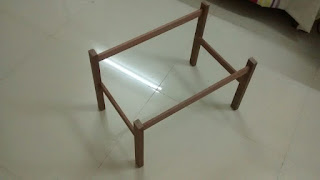
Hi all, welcome. I need to have a wash basin near my dining area. The dimension has to be 2'x1'6'' due to space crunch. I had a plan in mind, though I have ended up using few of my old hardwood structure in the table frame. I built a bed from where I have got this below structure. 

easy wash basin table, how to build a wash basin table, wash basin table DIY, wash basin table top
Bed head column from a DIY bed

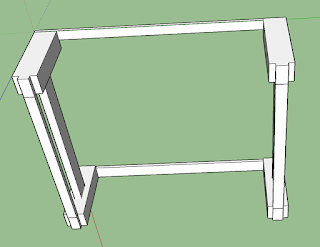
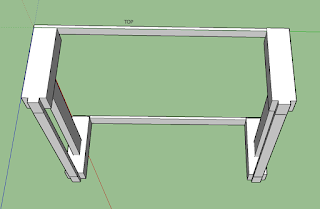
Flip these pieces 2 units - I will say it a "I" structure, add the support frames. We have almost got the inner structure. 

easy wash basin table, how to build a wash basin table, wash basin table DIY, wash basin table top

easy wash basin table, how to build a wash basin table, wash basin table DIY, wash basin table top

easy wash basin table, how to build a wash basin table, wash basin table DIY, wash basin table top

The structure is quite strong. Lets see a demo of whatever have been done so far. 


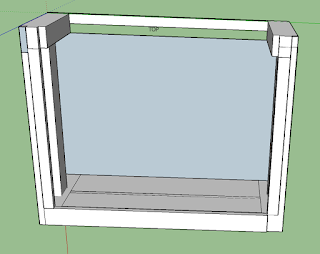
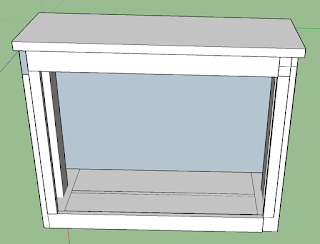
Further plan is to cover the sides except the front with 4mm plywood and then laminate it. I will put 18 mm ply or granite or marble stone on the top. I will definitely build a storage inside for sure. Let me show the future planning here.

easy wash basin table, how to build a wash basin table, wash basin table DIY, wash basin table top

easy wash basin table, how to build a wash basin table, wash basin table DIY, wash basin table top

easy wash basin table, how to build a wash basin table, wash basin table DIY, wash basin table top

easy wash basin table, how to build a wash basin table, wash basin table DIY, wash basin table top

easy wash basin table, how to build a wash basin table, wash basin table DIY, wash basin table top


Its a Sunday and I have resumed working on the table. As the frame has already been made yesterday, today I am planning to fix 4mm plywoods covering the frame. I had a 8'x4' of the same which is already laminated in one side. I just have to cut it in measured sizes and fix them to the frame by using nails. I have done it today and here is a photo.

easy wash basin table, how to build a wash basin table, wash basin table DIY, wash basin table top
DIY simple table top wash basin table
To be continued. 

Friday, February 24, 2017

How to build a simple TV unit - DIY woodworking India

How to build a simple TV unit - DIY woodworking India

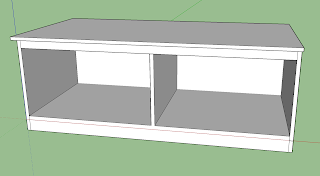
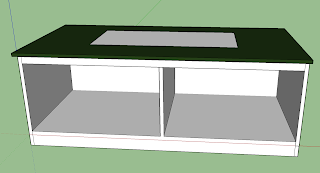
There are lots of TV unit designs available in the internet. However, I ended up building on my own design. It is perhaps one of the easiest ones. I have displayed one picture below.

simple TV unit design, tv unit diy, tv unit design DIY
A simple TV unit design
It is 4 feet long 1.5 feet tall and 1.5 feet deep inside. It has 2 compartments partitioned in the middle. I have painted the table top green to keep the green theme. There is still some work to be completed, a few pull outs to be fitted.

I have used 18mm plywoods throughout this project except the back where 4 mm ply has been used. The top is connected to the sides by L brackets. The sides are laminated white and wood beadings are fitted in the front edges. Let me share the details of the plan.

diy tv unit, diy tv table, diy tv unit simple, tv unit making, tv unit homemade, tv unit made easy
DIY tv unit design - 1

diy tv unit, diy tv table, diy tv unit simple, tv unit making, tv unit homemade, tv unit made easy
DIY tv unit design - 2

diy tv unit, diy tv table, diy tv unit simple, tv unit making, tv unit homemade, tv unit made easy
DIY tv unit design - 3

diy tv unit, diy tv table, diy tv unit simple, tv unit making, tv unit homemade, tv unit made easy
DIY tv unit design - 4

diy tv unit, diy tv table, diy tv unit simple, tv unit making, tv unit homemade, tv unit made easy
DIY tv unit design - 5

diy tv unit, diy tv table, diy tv unit simple, tv unit making, tv unit homemade, tv unit made easy
DIY tv unit design - 6

diy tv unit, diy tv table, diy tv unit simple, tv unit making, tv unit homemade, tv unit made easy
DIY tv unit design - 7


 The final product almost resembles this last picture in plan. 

Thursday, February 23, 2017

Sofa buying guide - DIY woodworking India

Sofa buying guide - DIY woodworking India


What are the points you need to consider while buying a sofa for your home? There are many. While many prefer buying a good branded one, some go for the non-branded ones. What are the pros and cons? How much money I should spend? How long the sofa should last? Is teak wood good for sofa? How about sheesham wood? Does rubber wood last long? What design I should select? Should I go for sectional sofa? There are so many questions floating in your mind that you are unable to decide which one you should buy?

Here goes some analysis based on my own research. Hope you will get some idea out of it.

What NOT to buy - sofa buying guide


Lets strike off what NOT to buy first, so that we won't miss it later. Most of these will be applicable to wooden sofa or sofa having wooden structure inside.


  1. Do not go for a sofa where MDF has been used to build its core structure. Core structure refers to the main structural body of the sofa. MDF damps when it comes in contact with water, thus there is a chance your sofa may not last long. When you go to a furniture shop, ask for the material used. If they say MDF, thats it. When you are buying online, then also check for it.
  2. When you check the sofa, do not miss out one thing. Lift the sofa at one end, may be a feet from the ground keeping the other end on the floor. This is a way to check the JOINERY if they are hidden inside the cover or outer body. If there is a problem in joinery, you can feel/see it by looking at the joints - for example sofa leg - sofa base joint. The joints should not be loose. Pay attention for any noise from the joints you hear when lifting. There should not be any. If there is, go for another sofa. 
  3. Push/drag the sofa horizontally. Do not drag much, shopkeeper might shout. In doing so, pay attention to the sofa legs particularly. They should not get bent in the joint.
  4. Sit on it, in the middle, with little force to check the base of the sofa. The middle of the base structure should not go inside. The cushion will of course go inside but I am talking about the inner structure. You will know when you free fall on it from couple of feet height. Just stand besides it and free fall on it. Particularly in case of 3 seater sofa, there should be proper reinforcement in the middle of the sofa base to bear the load on it. If that is missing or little weak, sofa base will go down in some time.
  5. Sit on it, lean on the back, again with little force. This is to check the joints(if any) between the back and the core structures. The back should not further bend back, even an inch. If so, go for another piece. 
  6. If the sofa has hand rest, handle etc, push/pull them with force to know whether they are tightly connected.  


Please do not miss out any of the above. If you are satisfied after checking all these checkpoints, the sofa is structurally strong and you can go for checking further what to have in that sofa.

What to buy for frequent shifter - sofa buying guide

Now next question. Should I go for a wooden or iron or cane sofa?

If you frequently shift your house with all your furnitures, go for an iron one. There will be less wear and tear when it comes to iron compared to wooden or cane sofa. The joinery of welded iron is stronger than that of wood or cane. When a good wooden structure comprises of mortise and tenon joints in the sofa, now-a-days average sofas are not having those, so structurally they are little weak. In case of cane sofa, they are joined by cane thread and nails, still not upto the mark. But cane is still more convenient in this case as you can yourself fix them easily without using any kind of tools.


Which wooden sofa to buy

Now comes to types of wood. We have several choices here, but we will be primarily stick to solid wood, sheesham wood and teak wood. 

  1. Solid wood - Never go by the literal meaning of the word solid wood. Solid wood does not mean that it is really cut from a tree as one piece and fixed. What it really means is engineered wood. Engineered wood is nothing but binding together wood strands, fibres, veneers and adhesives and make it hollow-space free. As it does not have hollow spaces, that is why it is called solid wood. Plywood, OSB, fibreboard fall in this category. Even MDF falls into this category which is nothing medium density fibreboard. Now as you know there are different categories of solid woods, go for the good solid wood ones. 
  2. Sheesham wood -  It is real hard wood and my favourite. If you are buying the sheesham wood sofa for home situated in humid or areas where there is much rain fall, here are few checkpoints. Is the sofa water proofed? Has oil treatment been done or varnished? Sheesham wood has less oil content than teak, hence more susceptible to moisture. If climate is dry, then you need to not worry. Sheesham wood will last long. It is resistant to wood termites as well. So, maintain it well, it will last generations. 
  3. Teak wood - It has more oil content than sheesham, rest all attributes are almost same. It is often used for construction of boat. It is a solid choice for your furnitures.  

Rubber wood sofa

There are few more. One of them is rubber wood. In the recent times, it has become popular in furniture making. Point to be noted here is that rubber wood is chemically processed so that it can prevent attack from insects, fungus etc. If these diffused chemicals are absent due to outdoor use of the sofa, you can expect insects attack.

Coil spring

Coil spring inside the sitting base is one of the good-to-have attributes in sofa. Now-a-days, it is available in the branded ones in the higher range. Of course, how they are installed, what material of coil has been used matter, but in the average priced sofas(<35k), coil springs are not used. There may be exception, but I am talking about in general.

Cushion density rating

Cushioning is another important point to consider. Higher density means you will feel the hardness, but it will last long in due course of years. Go for branded ones. Always ask for the foam/cushion density rating. The vendor should be able to tell you that. Sometimes they may tell you ILD(Identification load deflection) to be the density. But still you should be able to understand. Typically, sofa cushions start from density rating of 30. Anything equal or greater than this is fine.


Hope it helps. Thanks.


Bit and pieces of android app development part 2 - DIY woodworking India

Bit and pieces of android app development part 2 - DIY woodworking India


Hey all! Welcome. Hope you have gone through the first part of bit and pieces of android app development. If not, here is the link. That part was kind of introductory. It was more about how to solve an existing problem with the means you already have! technically. After all, it is more about passion and motivation. If you really want to solve a real problem with your heart and soul, I know you will do it. For that reason, anything coming your way - may it be a new learning or a skill set, you will surely do it. Learning android app development is just an another dot in that context, but the diameter of that dot is huge.

Continuing the discussion from our last blog, let us put a high level use case of our application.


Pictures can convey the message more clearly. The app user 1 has encountered the pothole and the app has written the coordinates and timestamp into the local sqlite data base of the android phone. Time to time, the app will upload the data to the server. Lets assume, it has already uploaded the data. App user 2 is approaching the same pothole, but he will see in his app that there is a pothole nearby. The app will send him a cautious message in terms of a tone or an alarm. Does it sound good?

Lets draw a high level design of our application. It is little more technical. But I will explain it in simple language.


This is a flow chart of the application we are going to build.

START - implies the application has started.
LISTEN TO THE ACCELEROMETER - implies that inbuilt accelerometer of the android phone is reading the acceleration value in X,Y and Z direction.
VALUE > 15 - implies that acceleration in either direction is more than 15.
RECORD GEOGRAPHICAL COORDINATES INTO DB - implies that phone's sqlite DB table is updated with the coordinates.
SYNC DB TO CLOUD SERVER - implies that phone's DB is uploaded to cloud server and data are synced.

Y and N means Yes and No respectively. Below picture depicts multiple users using the app syncing their own DB with cloud.


So far so good. I hope the design is pretty clear now. Let me give you some more detail. Two more diagrams are listed below.


No sooner than I am writing this blog, I have completed the application. Let me give you a screenshot and the play store link.


Here is the link to the app.

https://play.google.com/store/apps/details?id=com.sbordolo.potholefinder

You can install the app and try it out. If you find any difficulty, please comment.

Till this point, it has been only requirements and designs. You may be looking for the coding, of course. That will follow shortly in subsequent pages. Stay tuned.

Thanks for visiting DIY woodworking India.


Sunday, February 19, 2017

The making of cajon drum continues - DIY woodworking India

The making of cajon drum continues - DIY woodworking India 


Hello everyone, welcome to DIY woodworking India.

Please go through my earlier posts - making of cajon drum. I had fixed the laminates in that part. In this part, I will fix the legs and the sitting arrangement. The reason of fixing the legs is to keep the main cajon body just above the floor. If the wooden portion is in touch with the floor, the wood may get damped due to moisture on the floor and the cajon's sound may be affected.

The sitting mat is cut from a yoga mat. You can also do the same or you can even go for foam mat. Any cushion will do in this context.


After laying the mat, the final product looks like below. By the way, I have applied a colour in the slapping surface and the back, just for a good look. I liked it.


If you want to listen to a demo, here is a video.


Thanks for visiting cajon making episode and DIY woodworking India.


Saturday, February 18, 2017

The making of cajon drum - DIY woodworking India

The making of cajon drum(fixing laminate) - DIY woodworking India


Hey everyone. Welcome to DIY woodworking India.

I have fixed laminates on both the sides of the drum. I have kept it for a couple of hours without disturbing it so that laminates fit properly on the underlying cajon structure. For first part of the cajon making, please visit my post The making of cajon drum - DIY woodworking India. I have described about the structure, plan and the final product there.

In this part, I will touch upon the steps which I have not mentioned in that post such as fixing the laminates, giving it the final touch etc.


Laminate cutters are available in local hardware shops. The one I have is shown below:


Mark the line on the laminate you want to cut, place a ruler along with it and then draw the line with the cutter along the line. You have to draw the same line or mark couple of times until the laminate piece can be removed with a gentle pull.

Once pieces are ready, apply wood adhesive on the back of those and on the cajon body. Basically, we need to apply adhesives on both the surfaces which will join.

Once you have applied adhesive, put the laminates pieces gently on the cajon body. Be careful of putting it accurately on the surface so that you don't need to remove and put it again. For laminates bigger in size for example, 4'x8', we keep 4-5 sticks on the surface and then fix the laminate over it so that we can adjust the position of the laminate. Now, we have to put tape so that the laminate is fixed properly in the edges. This tape is known as masking tape. After it is fixed, keep the cajon unit at rest for a few hours till the adhesives dry. It will be be written on adhesive usage instruction how long you should wait for it to dry.

Here is a demo of my cajon drum.


Friday, February 17, 2017

Bit and pieces of android app development - DIY woodworking India

Bit and pieces of android app development - DIY woodworking India


Being in the tech world as a network engineer for almost a decade, I have always tried to keep myself up to date with the evolving technologies. It often eats up my free time. But believe me, its really good. There are so many things in there, unless you try it, you won't realise it. One of those things which I have tried is android programming.

As smartphones have become more and more popular, more and more people are connected via internet. Information transfer has become lightening fast. Everything is at your finger tip. To alleviate my learnings, I have started exploring android application development. I had an end goal of course. I was residing in an area where the road was full of potholes and there was no street light at all. Often, my back used to take the heat at night time. I was thinking what I can do to address that problem or perhaps solve it if possible. If there were 1 or 2 potholes, that would have been practical. But there were hundreds! I started raising complaints to fill those with the town planning authority. As expected, nothing happened as usual. Then I thought how about avoiding those potholes by putting sign boards! Too many it will be. But how about plotting the location of potholes on a Google map and alerting the user if he/she is about to hit it? Thats a good idea!

Therefore, my research started and I started gathering information about what all things I need to gather information about potholes. Either I have to inspect a pothole and plot the map manually or I have to  make everything automatic. Of course latter was better.

To detect a pothole, we need a sensor, an accelerometer. What is an accelerometer? It is a device which can give you acceleration value in XYZ direction. Just to mention, acceleration means rate of change of velocity. Its a vector entity. How we can use it for pothole detection? Whenever we hit a pothole, we fall vertically down. It may be very little but still there is a fall vertically. Therefore, accelerometer shows increase in acceleration value in vertical direction. That is the clue. Once you get values or reading like that, capture the geo location or latitude/longitude. Logically these are the two things we will be needing.

Now where I can find an accelerometer?
Its available in most of the android smartphones! Just google it, you will find related android API probably from android SDK 6 itself and accelerometer is present from that moment on.

Once we have the inbuilt accelerometer, we must know how to get the readings. There comes the android APIs, details about which we can find in google developer site. Lets stop here today. Next blog will be more about the entities in android application development. Till then, bye.


Tuesday, February 14, 2017

Simple diya stand design - DIY woodworking India

Simple diya stand design - DIY woodworking India

Hi all, welcome back. Hope you have read the first part of diya stand building. Here is the link: http://diywoodworkingindia.blogspot.in/2017/02/how-to-build-wall-mount-diya-stand-diy.html

In that blog, I have discussed about the plan and how I have done it. Lets watch the demo of the product.


This is functioning well so far. The fencing in the front is to prevent the diya and agarbatti stand from falling in the front. However, there is no fencing in the back. I thought as the back side is close to the wall, the wall itself can be a barrier.

Let me clarify a point here. What is the need of this kind of diya stand? There is indeed a need because if I keep diya & agarbatti inside a puja ghar, the base where you keep them becomes sticky due to oil and full of ashes too. It is difficult to clean it and ultimately it makes the other things little dusty.

Secondly, there is always a risk of fire spreading due to wooden carcass of most of the puja ghar. Hope you have noticed that too.

Thirdly, making the stand out of iron and keeping it little away from wall mean no risk of fire. It will be easier to clean it too.

Hope you have liked the idea, thanks for visiting us.

Monday, February 13, 2017

How to motivate yourself for woodworking - DIY woodworking India

How to motivate yourself for woodworking - DIY woodworking India


Hey all! Welcome to DIY woodworking India. Today, from my personal experience I can tell you, keeping yourself motivated is the "key" for anything you want to achieve. Now you may question me why do you want to do woodworking. The answer is not straightforward. Its not about woodworking. Its about everything you do, applicable to anything. Why do we read newspaper? To update ourselves about happenings around us and the world, isn't it? But we can live without it too. Choice is ours. Similarly, to develop a skill or to gain practical knowledge about something, you need to spend time with it. Take swimming for an example. Ok, now you will say - swimming is fine, but why woodworking? I will ask you - why some people collect postal stamp as a hobby?

Am I making some sense?

What motivates me to do woodworking? Sometime in mid 2013, I was going through a management blog - it was on marketing I believe. There it said, the world we are in today is all because of buying and selling. It asked everyone to build something - may it be a toy, craft and may be a writeup about something and then sell it. It also said about value addition to it. It all started from that point.

I remember, a cajon drum was in my mind. The average market price was almost INR10k at that moment.

At the beginning, I had to invest some money for tools required for woodworking. It costed me around INR 6-7k to buy a drill kit and a jig saw. I had to recover that money from the product I was going to build. The total expenses was around INR10k including plywood, adhesives and other miscellaneous things.

Finally, I started working on the cajon drum. From the plywood I had bought, 6 cajons would be born. I set the price at INR3.5k. Compared to 10k in the current market, 3.5k was a real cheap deal! When my first DIY cajon was born, I posted free ads in lot of places. I started getting calls, starting from serious musician to enthusiasts people. They came, tried it out, negotiated the price. At the end, one guy came who wanted to gift it to his musician brother. He gave me 3k!

That's it! I gave me immense motivation to build more of it and get a value out of it which people will like. I was really happy when people came to my house looking for the cajon drum and tried it out and praised me for the awesome bass the drum had! It was a great feeling. By the way, I did  lot of research how to maximise the bass of the drum, trust me. Uncle Helmholtz helped me a lot!

Finally, I could sell 3 of them. Having recovered all the money, I started woodworking more seriously.

I build couple of beds out of wood - all foldable.

Then, a tea table, dining table, and puja ghar.

Finally, building my kitchen interiors.


Thanks for visiting us - DIY woodworking India.


Sunday, February 12, 2017

DTH stand to cloth hanger - DIY woodworking India

DTH stand hack - How to convert it to cloth hanger


Hey everyone, welcome to DIY woodworking India. There are so many things you can build out of scraps! One of them for example, a DTH disk stand. I had an old one in my store room, thought why not give it a shape :-). The stand already had holes required for wall mount. Therefore, only things you have to do is - making holes/cuts to keep the hangers. 
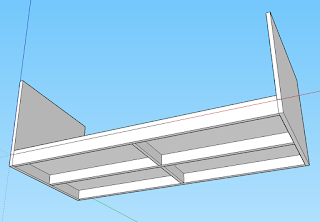

I removed the disk from the whole DTH disk unit, keeping only the main stand. Then using an angle grinder, make cuts 2 inch apart. These will be the grips for the hanger. 


Add colour to it, I have chosen black. Below is the product deployed :).


Thanks for visiting DIY woodworking India. 

Saturday, February 11, 2017

How to build a guitar wall hanger - DIY woodworking India

How to build a guitar wall hanger - DIY woodworking India

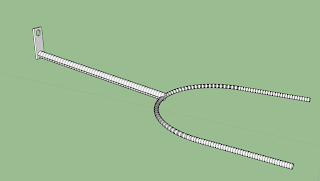
Hi all! Welcome to DIY woodworking India. Hope you are doing well. Today I will share how I have built my guitar wall hanger. It will be made of iron, so welding on our way!
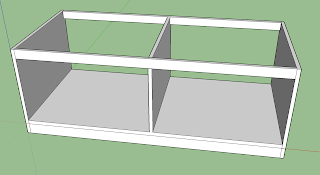
Materials:
1) U bracket
2) Iron rod of about 1/2 feet long
3) One quarter feet long 1 inch breath iron block - it will be used for wall mount.


We have to weld the U block to the iron rod first. For that, make a small groove in one end of the iron rod and file the U bracket in the middle such that they form a lock. Then weld them together.


Look at the joint carefully in the picture above. Lastly, weld the back with the hole to unit. Once welded, it looks like below.


Grind the edges and the entire unit so that there is no rust left. Now, it is time add some colour to it.

Almost done, but need to add rubber caps to the U unit, so that guitar can sit there smoothly without any scratch.

Thats it! Thanks for visiting woodworking India.


Thursday, February 9, 2017

How to use sketchup follow me (part - 2) - DIY woodworking India

How to use sketchup follow me (part - 2) - smooth a cylinder - DIY woodworking India


Welcome friends!
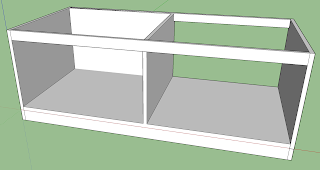
Lets explore the sketchup follow me feature more. We will see how a cylindrical shape can be made smooth at the edges using this feature. Sketchup made our life real easy! Watch the video to know how to do it.


I will post a series of videos so that you can understand more and more.

Thanks for visiting DIY woodworking India.

Wednesday, February 8, 2017

How I have made my bed table out of 1"x2/8" beading - DIY woodworking India

How I have made my bed table out of 1"x2/8" beading - DIY woodworking India


Welcome back friends! Everyone knows that a small bed table is probably one of the mostly used furniture now-a-days. When I operate my laptop in bed, I always keep it on it. Then take bed tea, reading a book etc etc. It is really useful! 

I have built one for us, out of 1" x 2/8'' wood beadings which I got from a wood mill. Price was INR 3/sqft. I had enough wood for INR 100, delighted! 

Here goes the plan.

Attach the beadings as shown in the picture by fevicol WRA or any suitable adhesive available for wood. In the edges, fix two beadings for holding it and for extra strength. You can use screws or fevicol for fixing these. Once done, keep them for drying so that joints become strong. 


For the legs, fix two pieces of 1 feet with adhesive. Once dried, make groove of 1''x1/4'' as shown above. Make another 3 units similarly. 


Join 2 legs as shown above 1.5 ft apart. Join other pair as well.


Just forgot to add, make another grove in the leg as shown in the picture. Repeat the same for all the four legs. 


 Now fix the side beadings as shown below. Repeat the same for the other pair of legs.


Once all the parts are assembled, it looks like below.


Now join the leg part and the top part by L bracket as shown below.


This is how I have built the table. Comment if you have any doubt. 

Thanks for visiting DIY woodworking India. I will post the pictures of the real table.


Just found the old photographs of the table. Hence posting the same.

DIY bed table plan, diy bed table project, diy bed table, how to build a bed table, how to build bed table, diy bed table idea
Building the frame of DIY small bed table

DIY bed table plan, diy bed table project, diy bed table, how to build a bed table, how to build bed table, diy bed table idea
Building the frame of DIY small bed table

DIY bed table plan, diy bed table project, diy bed table, how to build a bed table, how to build bed table, diy bed table idea
Adding a layer of primer on the DIY bed table

DIY bed table plan, diy bed table project, diy bed table, how to build a bed table, how to build bed table, diy bed table idea
Added colour to the DIY bed table

DIY bed table plan, diy bed table project, diy bed table, how to build a bed table, how to build bed table, diy bed table idea
Added colour to the DIY bed table

DIY bed table plan, diy bed table project, diy bed table, how to build a bed table, how to build bed table, diy bed table idea
DIY bed table in production

ad