ad

Friday, March 31, 2017

Improve air circulation in your home part 2 - DIY woodworking India

Improve air circulation in your home

Welcome friends. Lets continue our discussion from where we left in our previous post. Please go through it to know more about the use case about the room having only a single door. Today, lets take another use case where we have one door and and a window.

air circulation diy, how to improve air circulation, improve air circulation in room, improve air circulation in your home

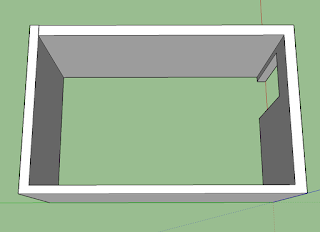
This is one of the most familiar room structure in apartments and standalone houses. It has a door in one end and a window in the opposite side. First thing we need to check when both the door and window are open, does air circulate or flow from one side to another? It does matter because although you have passages for the same, the room may be surrounded by another closed wall particularly outside the door. For example, another room attached to the door side and what if the door and window of the same are closed. In that case, air will not be circulated. In most of the rooms as shown in the above picture, we do have ceiling fans. But in most of the cases, table fan as shown in the below picture has advantage as it can be placed according to your need and it can get you fresh air quickly.

air circulation diy, how to improve air circulation, improve air circulation in room, improve air circulation in your home


In the above picture, the fan is blowing towards the window, creating low pressure instantly at its back and air will come from the door. In case of ceiling fan, air is blown downwards and that air tries to escape from both door and window. But from where the air will come in? The same door and the window have to do facilitate that. In the old houses, we always had ventilator just below the roof level. Now-a-days most of the builders do not provide that. Those ventilators played a vital role in facilitating incoming air for the ceiling fan which is at the similar level of that of the former. Another role of ventilator is to provide a passage to hot air to go outside. Remember, hot air has less density than cold air and the former stays above it.

Considering that we do not have ventilators in most of the rooms in our houses, table fan is more advantageous than ceiling fan! Follow the same practice in your home for couple of days and let me know the results.


Thursday, March 30, 2017

Improve air circulation in your home - DIY woodworking India

Improve air circulation in your home

I have seen in many houses particularly in apartments, that the air inside a room or in the whole house does not circulate or it remains static. Most of us often neglect it or don't feel it. But at times, you will feel suffocated or you will wake up with dizziness or a heavy head. But you might have noticed that when you keep your exhaust on in the bathroom attached to your bedroom and sleep that night, the morning dizziness does not appear.

These all happen because of poor air circulation inside the house. The key is air should be able to come inside from outdoor and the air inside should be able to go out. If we take care of it, we can enjoy benefits of fresh air. Of course, air conditioning does the same thing besides controlling temperature and purifying air. But today we will discuss about achieving the same, in a much cheaper way.

Firstly, we have to see whether you have windows/doors at proper places in your house. Then based on that, we will figure out what best can be done for solving the problem. Lets take a use case.

improve air circulation in your home, how to improve air circulation, air circulation diy, improve air circulation in room

This is a room having a single door, no other way air can travel in/out. What can we do now?

First of all, do not buy a flat having this kind of room, never. If at all you end up buying it, then you may have to do some wear and tear either with the wall or the door. For this kind of room, buy a door which is having holes in it. For example, door having net, grill door. Another kind of grill door known as ventilation door grill - which is very convenient for privacy, at the same time for air circulation as well. Once you fit this kind of door, that means you have just given a provision for air flow, but not actually enabled circulation. For that to happen, look at the figure below.


improve air circulation in your home, how to improve air circulation, air circulation diy, improve air circulation in room

improve air circulation in your home, how to improve air circulation, air circulation diy, improve air circulation in room

We have laid pipes along the roof or the side walls having an exhaust blowing inside. The fan will suck air into the pipe and exhales it far inside the room preferably the opposite corner of the room. Of course, there will be some amount of air which will flow from outlet into the inlet again. But due to suction near the door, air from outside the door (that is why ventilation door grill) will also flow in and keep the level of carbon dioxide low. You will definitely get fresh air.


Monday, March 27, 2017

Camera holder plan continues - DIY woodworking India

How to build a camera holder 


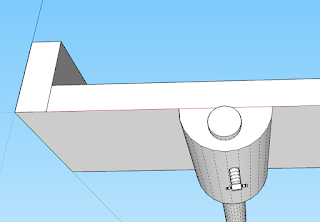
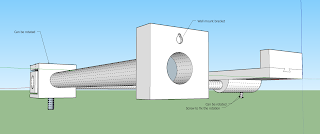
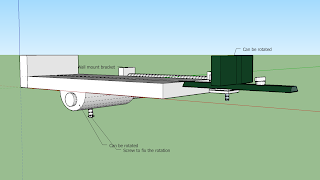
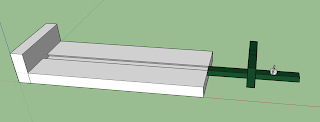
Continuing from my previous post, we can add up lot of things. How about adding a stick to it, just like a selfie stick? Lets explore our plan.

A camera holder plan, A camera holder project, camera holder case, camera holder plan diy, camera holder project, how to build a camera holder

A camera holder plan, A camera holder project, camera holder case, camera holder plan diy, camera holder project, how to build a camera holder

A camera holder plan, A camera holder project, camera holder case, camera holder plan diy, camera holder project, how to build a camera holder

A camera holder plan, A camera holder project, camera holder case, camera holder plan diy, camera holder project, how to build a camera holder

A camera holder plan, A camera holder project, camera holder case, camera holder plan diy, camera holder project, how to build a camera holder

A camera holder plan, A camera holder project, camera holder case, camera holder plan diy, camera holder project, how to build a camera holder

A camera holder plan, A camera holder project, camera holder case, camera holder plan diy, camera holder project, how to build a camera holder

A camera holder plan, A camera holder project, camera holder case, camera holder plan diy, camera holder project, how to build a camera holder

A camera holder plan - DIY woodworking India

Planning to build a camera holder by yourself? Here is a plan.

Materials required: 
Plywood - 18 mm thick
Screws - 1.5"

Tools used:
Chisel
Router
Saw

A camera holder plan, A camera holder project, how to build a camera holder, camera holder case, camera holder project, camera holder plan diy

A camera holder plan, A camera holder project, how to build a camera holder, camera holder case, camera holder project, camera holder plan diy

A camera holder plan, A camera holder project, how to build a camera holder, camera holder case, camera holder project, camera holder plan diy


How to build round cabinet

Perhaps this is one of the toughest things to do in woodworking. I have not built one for myself yet, but referred a lot of videos on that topic. Let me put my learnings here.

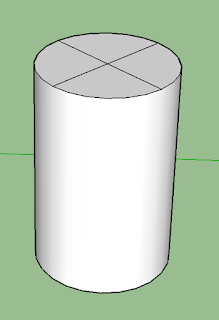
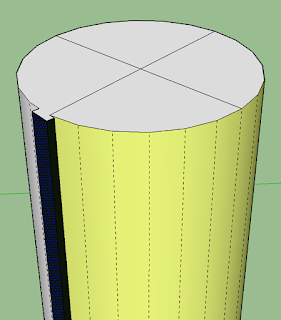
Bending plywoods is not easy. For that, you need to bend a few thin plywoods using bending vice(it can be custom made of readymade) and then join them together using glue. Let me illustrate the process by using few diagrams.

Grab any round shaped drum made of hard plastic or tin. The choice of it is the amount of roundness you want in the plywood. Get 4 mm thick plywood, otherwise, it will be difficult to bend them. As shown in the figures below, bend them on top of the surface of the drum.

how to build round cabinet, how to build round wooden cabinet, how to build round wood cabinet, how to bend plywood, how to bend wood

how to build round cabinet, how to build round wooden cabinet, how to build round wood cabinet, how to bend plywood, how to bend wood

how to build round cabinet, how to build round wooden cabinet, how to build round wood cabinet, how to bend plywood, how to bend wood

See the wood block I have fixed to hold the edges of the bending plywood. Once you get 3 or 4 pieces of bent plywoods of 4 mm thickness, next step is to join them together using glue and after that, hold them on the round drum. Keep them as instructed in the adhesive usage information. After that amount of time, your rounded plywood will be ready.


Thursday, March 23, 2017

How to operate an angle grinder - DIY woodworking India

How to operate an angle grinder 


Angle grinder is one of the most commonly used tools in welding, carpentry, steel work etc. The primary use of this tool is to smoothen iron/steel edges, surfaces etc. It is also used in smoothening marble, concrete surfaces too. There are different angle grinder blades for metal, concrete etc. The tool is also used in cutting and polishing.

When dealing with this tool, be extra careful about your eyes particularly when you are dealing with metal cutting or grinding. I will say, take the necessary safety tips as mentioned in my circular saw safety measures post.

angle grinder guidance, angle grinder guide, angle grinder how to use, angle grinder usage, how to handle angle grinder, how to operate angle grinder
Dewalt angle grinder

Here is an intro video of angle grinder.


Here is demo of the angle grinder, how to cut an extended nail.


Related articles:

How to operate a circular saw
How to operate a jig saw

Wednesday, March 22, 2017

How to operate a circular saw - DIY woodworking India

How to operate a circular saw 


Related article
How to operate a jig saw

Hello friends, welcome to DIY woodworking India. I am little busy these days in office, hence sharing how to operate tools, videos of which I have done some time back. Today I will guide you how to operate a circular saw. You have to be extra careful in handling it. Some of the points I have noted down.

Circular saw comes in different power ratings and different sizes, commonly used are 7" and 4". In Indian carpentry which deals with interior works, you will see 4" in 90% of the cases. While coming to precautionary measures -


  1. Always use safety googles 
  2. Use gloves
  3. Do not put your hand below the wood which you are cutting
  4. Make sure that the circular saw electric wire, connected to power socket, is not hanging near the blade
  5. Be comfortable while operating the circular saw. Do not take any alcoholic beverages before or during the work with this tool.
  6. Keep children away
  7. Use earbuds to protect your hearing
  8. The wood piece you are cutting should be properly sit, it should not move during cutting.
Once you take care of these points, you are ready to operate the tool. 

Here are few videos:


Hope it helps.

Tuesday, March 21, 2017

How to operate a jig saw - DIY woodworking India

How to operate a jig saw

~ Please use safety glass and gloves while using power tools however small it is.

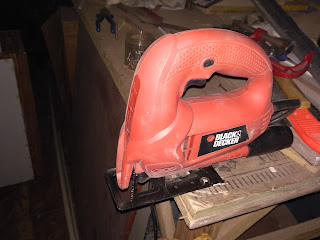
Jig saw is one of the handy power tools available today. It is very easy to operate. If you know how to iron your cloth, thats it. The same way, jig saw is operated.

Jig saw is useful when you need to cut wood other than straight cut. The manoeuvre of the tool is quite easy and it is lighter than other power saws. That is why, you can move it around effortlessly.

Blades of different thickness are available to cut different type of wood or to get differently finished cut. Then for metal cut also, different blades are available.

You can use a guide too along with the jig saw when required. Lot of carpenters use a guide while cutting in a perfect straight line. Many use it as a table saw also. I too used it for sometime.

how to cut using jig saw, how to cut wood using saw, how to handle jig saw, how to operate a jig saw, how to run jig saw, jig saw guide, jig saw usage guide, jig saw wood cut

how to cut using jig saw, how to cut wood using saw, how to handle jig saw, how to operate a jig saw, how to run jig saw, jig saw guide, jig saw usage guide, jig saw wood cut

I will post a video about how to operate a jig saw. Stay tuned.

Here is an introductory video.


Monday, March 20, 2017

Another review of TS-2380 A staple gun

TS-2380 A staple gun

Please refer here for my first review. I have been using it for a couple of weeks by now. Hence I thought of sharing my view on the same.

I was using 23/10 staple pins on neem wood just for experiment. The regulator to adjust the force is kept on the highest side as the wood is really hard. The same piece of wood gave me a hard time cutting it using circular saw recently, so you can imagine the hardness. When I stapled, you won't believe, the pin has gone fully into the wood. To my rejoice, the top of the pin went little more than the wood surface. Perfect!

When I ordered the product, I never realised that it would exceed my expectation.

Sunday, March 19, 2017

Strength of a shelf - DIY woodworking India

Strength of a shelf 


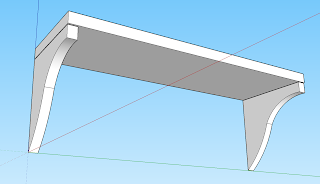
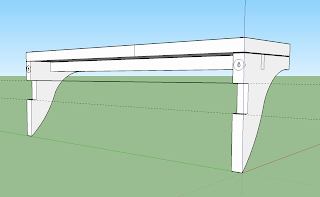
In woodworking, we build different kinds of shelves, for different purposes. Take a very simple one as described here. The strength of this shelf depends on the 2 things. Firstly, the base - how much load it can bear till it breaks. Usually, we use 18 mm or more thick plywood or solid wood. Therefore, chances are less that it will break.

strength of a shelf, how to make a shelf strong, making a strong shelf, more strong shelf, diy woodworking india

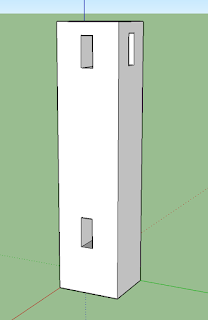
If we still need more strength, see below picture. You have to cut 2 slots in both support pieces. Then fit hard wood or aluminium connecting these slots. If there is risk of making the support blocks weaker when you cut the slot, you can make slot as small as possible and then fit aluminium of steel rods.
strength of a shelf, how to make a shelf strong, making a strong shelf, more strong shelf, diy woodworking india

strength of a shelf, how to make a shelf strong, making a strong shelf, more strong shelf, diy woodworking india

More stronger


If you still think that the shelf needs more strength, look at the below diagrams.

strength of a shelf, how to make a shelf strong, making a strong shelf, more strong shelf, diy woodworking india

Here in the back of the support blocks, we have cut slot in each. Why? It can be used to fit the mounting block. The more accurate the mounting block size, the more the strength will be. 2-3 mounting screws will be ok for a 2' long shelf. Below are 2 different mounting blocks. Second one will give more strength for the base as well.

strength of a shelf, how to make a shelf strong, making a strong shelf, more strong shelf, diy woodworking india


strength of a shelf, how to make a shelf strong, making a strong shelf, more strong shelf, diy woodworking india

To get more strength, use anchor screws in the wall. 

How to build a simple wash basin table - part 2

How to build a simple wash basin table


Hi friends, welcome back. This post is a continuing one from the first part of building simple basin table. Here is the link. Till that part, I had just made the carcass. Today I will show you how I have made further progress on it.

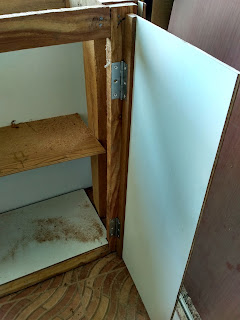
I have cut the doors in size using 8mm plywood. As I will not put load on the door, this much thick plywood will be ok. Then hinges need to be fixed. Since plywood is not that thick, I have to fix an additional wood beading so that screws can sit well holding the hinge on the door. Two hinges are fit in each door.

easy wash basin table, how to build a wash basin table, wash basin table DIY, wash basin table top

Then door is fitted to the main body with the other side of the hinge. Keep proper gap so that door is well above the ground level and it should have clearance on the sides so that while opening, it opens by at least 90 degree.

easy wash basin table, how to build a wash basin table, wash basin table DIY, wash basin table top

Two hinges on the each door are fixed.

easy wash basin table, how to build a wash basin table, wash basin table DIY, wash basin table top

easy wash basin table, how to build a wash basin table, wash basin table DIY, wash basin table top

Both the doors are fixed on the main body now.

easy wash basin table, how to build a wash basin table, wash basin table DIY, wash basin table top

Then I have fixed laminates on the sides and doors. Use carpenter's masking tape for holding the laminates on the sides.

easy wash basin table, how to build a wash basin table, wash basin table DIY, wash basin table top

easy wash basin table, how to build a wash basin table, wash basin table DIY, wash basin table top

easy wash basin table, how to build a wash basin table, wash basin table DIY, wash basin table top

easy wash basin table, how to build a wash basin table, wash basin table DIY, wash basin table top

I have used fevicol marine for fixing the laminates. Its water resistant, good because the basin body may have to withstand moistures once in action.

easy wash basin table, how to build a wash basin table, wash basin table DIY, wash basin table top

I have fixed plain wood beadings on the door. Two reasons - first one is - to have enough thickness so that I can fixed a door handle on it. Secondly, alignment of the doors. It will hide any discrepancy.

easy wash basin table, how to build a wash basin table, wash basin table DIY, wash basin table top

On both the sides, I have used wickes beading (I hope this is the correct name for below type of beading - got to know from a hardware shop guy).

easy wash basin table, how to build a wash basin table, wash basin table DIY, wash basin table top


Stay tuned for the next part.


Friday, March 17, 2017

A simple tea table design - DIY woodworking India

A simple tea table design


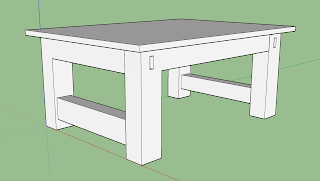
Here is a basic tea table design which you can build quite easily. Hard wood will be better for the frame. For the table top, plywood of 18mm onwards will be better. For the joints in the frame, mortise tenon will be good to have which will give more stability.

a simple table design, tea table design idea, tea table project, tea table made easy, tea table plan, diy tea table plan, tea table easy idea

a simple table design, tea table design idea, tea table project, tea table made easy, tea table plan, diy tea table plan, tea table easy idea

a simple table design, tea table design idea, tea table project, tea table made easy, tea table plan, diy tea table plan, tea table easy idea

a simple table design, tea table design idea, tea table project, tea table made easy, tea table plan, diy tea table plan, tea table easy idea

a simple table design, tea table design idea, tea table project, tea table made easy, tea table plan, diy tea table plan, tea table easy idea

a simple table design, tea table design idea, tea table project, tea table made easy, tea table plan, diy tea table plan, tea table easy idea

a simple table design, tea table design idea, tea table project, tea table made easy, tea table plan, diy tea table plan, tea table easy idea

a simple table design, tea table design idea, tea table project, tea table made easy, tea table plan, diy tea table plan, tea table easy idea

a simple table design, tea table design idea, tea table project, tea table made easy, tea table plan, diy tea table plan, tea table easy idea

a simple table design, tea table design idea, tea table project, tea table made easy, tea table plan, diy tea table plan, tea table easy idea

a simple table design, tea table design idea, tea table project, tea table made easy, tea table plan, diy tea table plan, tea table easy idea

ad